
LAR2100 AR10655 Linear Induction Sealer Instruction Manual
Linear Induction Sealer Instruction Manual LAR-2100 AR10655
Technical manual for use, safety, installation, adjustment, maintenance and troubleshooting for the LAR-2100 linear induction sealer.
Quick Fact Sheet
| Model | LAR-2100 |
|---|---|
| SKU | AR10655 |
| Family | Linear induction sealers |
| Sealing diameter | 22-180 mm |
| Speed | ≤110 containers/minute |
1. Safety before using the machine
- Connect to AC 220V 50Hz with reliable grounding.
- Do not use ungrounded plugs or unstable electrical installations.
- Keep the equipment in a dry, ventilated area and away from splashes.
- Do not bring large metal pieces near the heating surface of the induction head.
- Avoid strong sources of interference such as arc welding, industrial compressors, or high-frequency ovens.
- Disconnect the power supply before opening, inspecting, or cleaning internal parts.
2. Operating principle
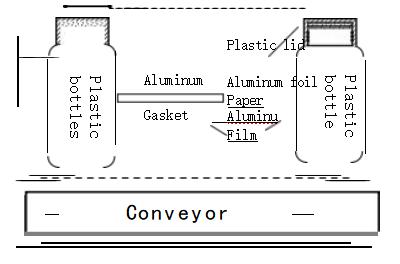
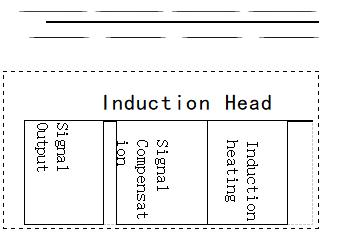
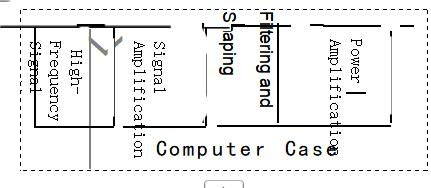
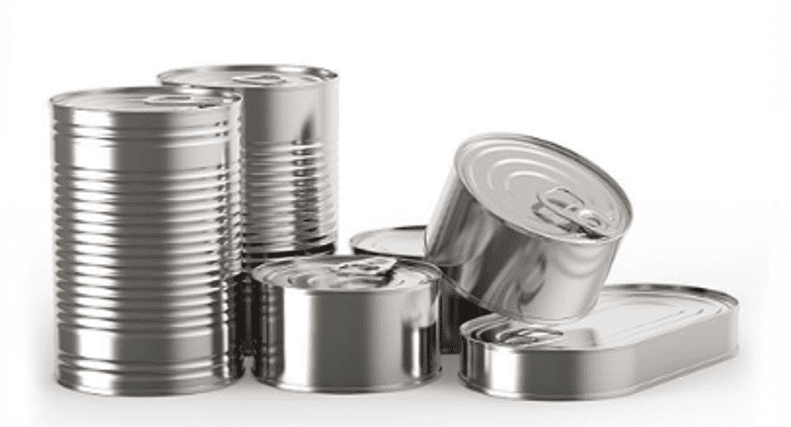
The LAR-2100 uses electromagnetic induction heating. The container passes under the head with a compatible lid and an aluminum liner, disc, or cap. The induction field heats the aluminum without direct contact and activates the heat-sealable layer to bond it to the container opening.
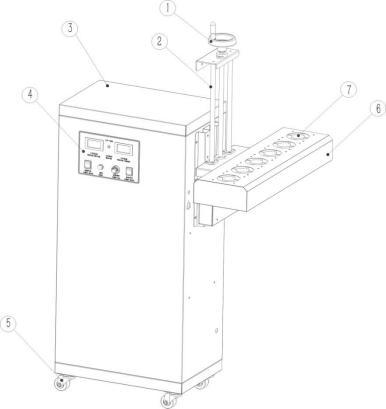
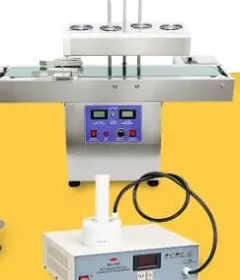
3. Main parts
- Control cabinet: It integrates controls, regulation, and power electronics.
- Induction head: performs the heating of the liner during the passage of the container.
- Adjustable support: It allows you to adapt the height to the packaging format.
- Adjustment wheel: adjusts the vertical position of the head.
- Fans: They cool the printhead during operation.
- Base with wheels: It facilitates the movement and placement of the equipment.
4. Installation and commissioning
- Remove packaging and check for any visible damage.
- Place the machine on a stable, dry, and level surface.
- Check that the grilles and fans are clear.
- Connect the equipment to a 220V 50Hz AC outlet with effective ground.
- Turn on the main switch and check the voltage reading.
- Perform a test without packaging to verify that the equipment responds correctly.
5. Sealing adjustment
- Place the aluminum liner inside the lid and close the container tightly.
- Adjust the printhead height according to the format.
- As an initial reference, work with an approximate distance of 2-3 mm between lid and heating surface.
- Align the container so that it passes centered under the print head.
- Regulate the flow rate and check the quality of the seal.
- If the liner does not adhere, reduce speed or move the print head slightly closer.
- If the liner yellows, wrinkles, or burns, increase speed or slightly separate the print head.
Important: The result depends on the container, lid, liner, closing pressure, speed, and distance to the print head. It is advisable to validate each actual format before production.
6. Cleaning and maintenance
- Clean dust and debris from the printhead, fans, grilles and work area.
- Check that cables and connectors do not have any looseness or abnormal heating.
- Do not open the cabinet with the equipment connected.
- Request a technical inspection if repeated blown fuses, loss of power, electrical smell, or starting failures occur.
7. Frequent incidents
| Symptom | Possible cause | Recommended action |
|---|---|---|
| It won't turn on | Loose wire, fuse, or switch | Check the connection, fuse, and request service if it happens again. |
| Incomplete sealing | Insufficient heat, poor alignment, or incompatible liner | Reduce speed, center container, check liner and distance. |
| Burned or wrinkled foil | Excessive heat or too slow a pace | Increase speed or separate print head. |
| Irregular sealing | Irregular mouth, loose lid, or containers too close together | Improve closure, separate packaging and discard defective formats. |
8. Technical data
| Model | LAR-2100 |
|---|---|
| SKU | AR10655 |
| Voltage | AC 220V 50Hz |
| Nominal power | 4200W |
| maximum induced current | 8.5A |
| Refrigeration | By air |
| High-speed fan | 4400 rpm |
| Sealing diameter | 22-180 mm |
| Container height | Adjustable |
| Sealing speed | ≤110 containers/minute |
| Daily capacity | ≤50,000 containers/day |
| Material | Stainless steel |
| Net weight | 60 kg |
| Equipment dimensions | 1200 × 385 × 934 mm |
| Packaging dimensions | 1300 × 470 × 600 mm |
| Certifications | CE, RoHS |
Related ARC support
For spare parts, warranty, preventive maintenance or technical support, please refer to the product data sheet and ARC support pages.